6 September 2016

Sweet and Sour Fermented Cucumber Salad


This recipe is adapted from Donna Schwenk sweet pickle relish:
https://www.culturedfoodlife.com/sweet-pickle-relish/

This ferment takes only about 2-3 days to make due to the high water content of the cucumbers.
It has pleasant refreshing taste and stays crunchy for a few weeks.

Ingredients:

all ingredients are organically sourced

350 g filtered water (approximately)
1 1/2 medium cucumbers
1 white onion
1 small sweet pepper
4 gloves of garlic
1/2 tsp mustard seeds
1/2 tsp celery seeds
1/2 tsp fennel seeds
1/2 tsp black peppercorns
3-4 florets of celery or dill (optional)
1 1/4 tsp unrefined sea salt or Himalayan pink salt
1 tbsp raw unpasteurized honey (or unrefined cane sugar)
2 tbsp previous brine (omit when making for the first time)

Equipment:

around 800 ml glass jar with a lid (can use recycled)
measuring spoons (optional)
kitchen scale (optional)
medium mixing bowl
chopping board
sharp knife

Directions:

Wash the jar and sterilise if desired. Measure out all the  spices except salt and honey and keep them aside for now in a little bowl.


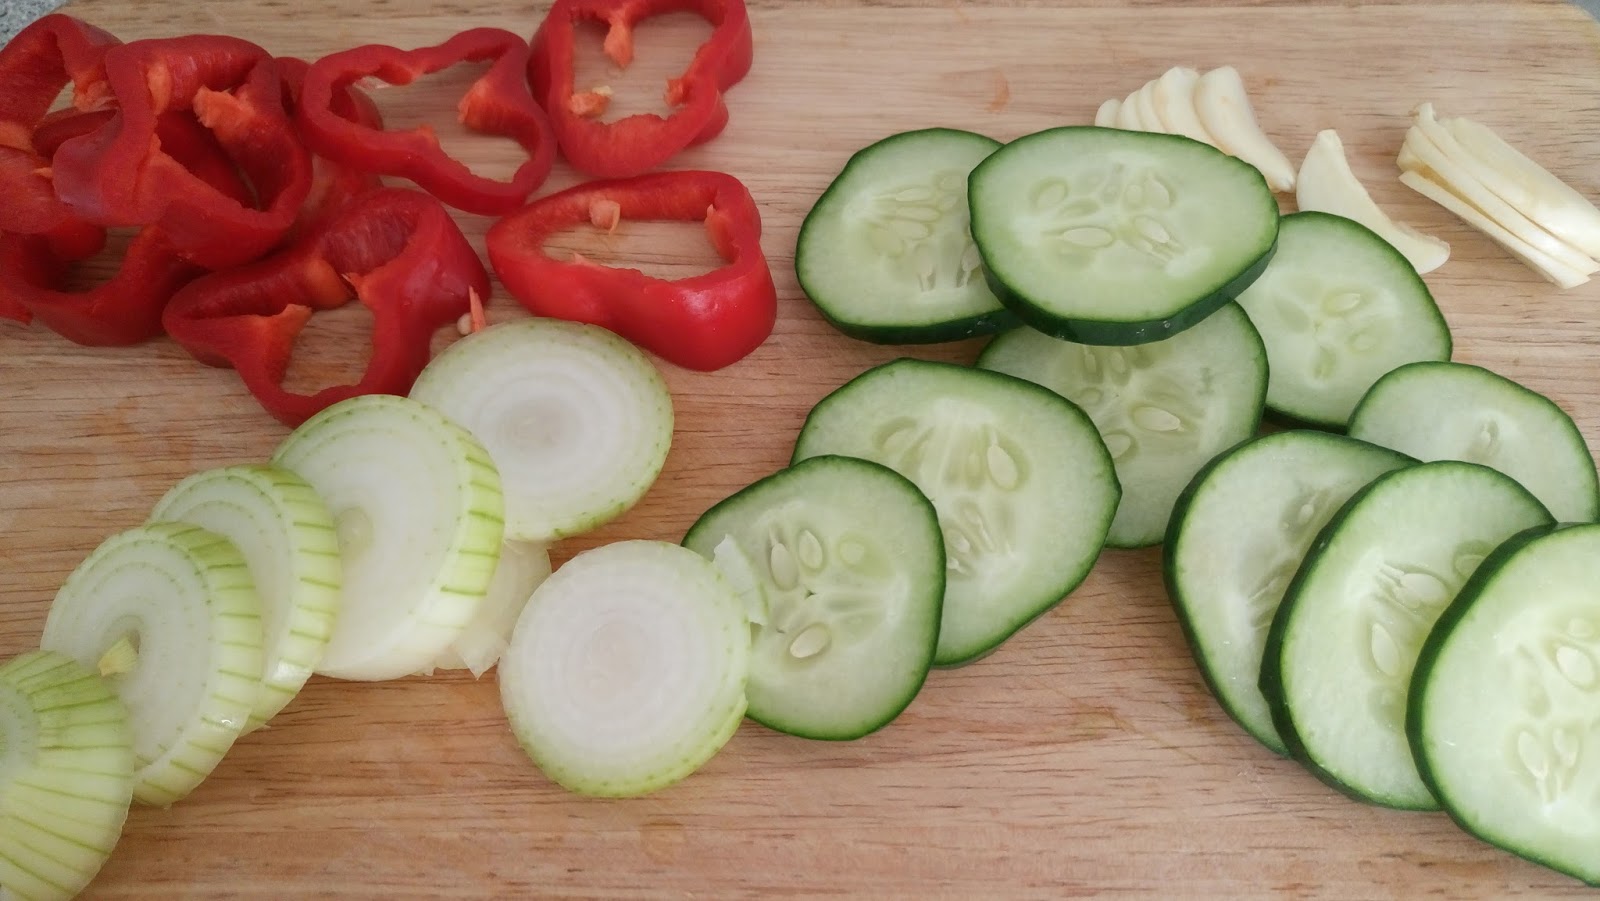
Slice the vegetables


and pack into the jar pressing them down very lightly with your hands and cover with filtered water to determine the amount of water needed. Keep the top of the liquid 4-5 cm below the top of the jar.
If making this recipe using the previous brine then remember to leave some space to add the brine later. Holding the vegetables with your fingers pour the water out into a mixing bowl and add honey (sugar) and salt, stir it to dissolve everything well. Then put all the spices into the jar and fill it with sweet and salty water. Add the brine from the previous batch at this point, if using.


Cover tightly with the lid and leave to ferment at room temperature and away from direct sunlight for 2-3 days.


Around the second day, you will see small bubbles on and in the ferment when you open it to check, this means that beneficial bacteria is actively transforming your fresh vegetables into pro--biotic condiment.
Then place into the fridge. I usually give it an additional day in the fridge and then start eating it.

I tried the same recipe for cherry tomatoes and it took around 7 days to be ready. The tomatoes had nice taste and texture but the accompanying vegetables (I only used garlic and onion) became slightly slimy, which was not very pleasant.


30 July 2015

Fermented Carrots, Cauliflower and Garlic.

This recipe is very popular with kids and adults alike. Very good as finger food and cocktail snack.
This is very easy to make, ready within a week.


1 medium cauliflower
2 - 3 large carrots
5-6 roots of jerusalem artichokes (optional)
1 - 2 heads of garlic

1 tsp juniper berries (optional)
1 tsp black pepper corns
6 bay leaves
1 tbsp sea salt per 750 ml of water
filtered water
clean glass jar/s with lid/s

Wash vegetables, clean the leaves off the cauliflower, cut it up into florets or smaller, peel carrots and cut into 2 cm cubes or as preferred, peel the garlic, large cloves can be cut in half or quartered.

Take large enough clean glass jar, place garlic at the bottom, then pack the carrots and cauliflower, make sure that the jar is big enough to allow minimum of 3 cm space between the veg and the mouth of the jar.

Fill in the jar with filtered water to measure how much water will be needed, make sure that water covers the vegetables completely and there is still 3 cm space between water and mouth of the jar. Holding the vegetables in place pour all the water out of the jar into a bowl, weigh it down so you know how much salt to use, now add the sea salt to the water and mix it properly, make sure to dissolve the salt in water completely, this might take a few minutes.

Put the spices into the jar, pour the salty water back into the jar, close the jar tightly, cover with kitchen towel to prevent the light affecting the fermentation process and leave at room temp somewhere on the kitchen counter for 7 days (in warm weather 6 days might be enough) to ferment.


Make sure to check the vegetables at least once every day, burp it, taste it and push it under the water if needed, there will be some visible bubbles which indicate that the fermentation process is very active.


After a week transfer to the cold storage/fridge and start consuming.

Fermented Spicy Carrots


This recipe was inspired by my childhood memories of my mother making what we used to call 'Korean' Carrots that was a marinated condiment using vinegar, oil and sugar among other things. I really liked the flavour and decided to replicate the taste but wanted a healthier dish. I have been quite crazy about fermented foods and condiments during the past couple of years and so used the fermentation for this recipe.

Ingredients:

3-4 carrots
1-2 medium garlic cloves
1 medium hot chilli pepper
1 medium sweet apple
rind of 1/2 lemon
2 cm ginger root
1/8 tsp ground cayenne pepper
1 - 1.5 tsp ground coriander
2 tsp coriander seeds
1 -2 tsp sea salt

Instructions:

Peel the carrots and julienne them using a mandolin slicer or a knife, place in a bowl. Julienne garlic, chilli and peeled ginger root. Try to cut the ginger root as finely as you possibly can. Sprinkle the salt over the vegetables, add the lemon rind, add the ground spices and the coriander seeds, mix everything up properly. Peel the apple and julienne it as well, add to the carrots, mix well, cover with a lid or a plate and leave to rest for up to few hours so it releases enough juices.


After 30 min or up to 2 hours place the carrots into a glass jar, I use recycled, press down with a fork or a spoon to submerge the vegetables under the brine to avoid the formation of mould. Make sure to pack the vegetables to leave around 1 cm from the brim of the jar. Cover with the lid tightly and leave at room temperature away from direct sunlight.

Remember to check the carrots every day to make sure that the vegetables are submerged under the brine. Depending on the temperature in your kitchen the spicy carrots will be ready in around 3 days. If it is very warm they might be ready in 2 days. Make sure you taste the carrots every day to notice the change in taste and to determine the readiness.

16 December 2014

Sourdough Bread Rolls / Burger Buns


Ingredients:

50 g unsalted organic grass fed butter/organic grass fed lard at room temperature
100 g raw organic milk
100 g active white sourdough starter
1 organic free range egg
1 tsp unrefined sea salt
1 tbsp raw honey (or other healthy sweetener)
300 g white organic flour (all purpose or strong, unbleached)
organic rice flour for shaping the rolls/buns (optional)
more unsalted butter/lard for greasing and brushing (around 2 tbsp)

Instructions:

Combine all ingredients in a bowl until you have a soft pliable dough.
Cover the bowl with a cling film and leave at room temperature to ferment for minimum of 8 hours or overnight.
In the morning or after fermenting the dough place it into the fridge for 2 hours so it is more manageable later.

After 2 hours melt a few tsp of butter/lard in a small saucepan, grease the glass or stainless steel baking dish of any shape with melted butter/lard.
Take the dough out of the fridge and turn it into a floured (I use rice flour but any will do) working surface and using a knife, a bench scraper or your hands divide the dough into 8-10 parts, make rolls/buns and place them into the greased baking dish 2 cm apart from each other and from the walls of the dish.
Using pastry brush apply the rest of the melted butter/lard on each roll/bun covering them all over.
Cover the baking dish with the rolls/buns with a cling film and leave to rise in a warm place for 3-5 hours or until they double in size and the sides of the rolls/buns are touching each other and the tray.


When ready preheat oven to 220°C, bake the rolls/buns for 15-20 minutes or until golden brown.
Cool them down.

They keep well in airtight container for up to a week, may be even longer I never get to test that as we usually finish ours off within few days.

They are excellent as dinner rolls with main dish and gravy or with plain butter or herby butter especially when still still warm. They are also excellent as burger buns, they are very soft and do not crumble when you squeeze them together with the burger meat in between and are not chewy at all.

Please enjoy and leave your favorite way to eat them in the comments below.


20 November 2014

Sourdough Rye Brick Bread (Kirpichik)

This bread resembles the one we used to have in Soviet Union times and was called Kirpichik (Brick). The bread using this recipe comes out tasting exactly like the one we used to buy in the shop.
This bread is made in 2 stages. First you need to make production sourdough and then the bread itself.
As always I would recommend reading through the whole recipe before starting to implement it.


STAGE 1

Ingredients:

For production sourdough:

50g active rye sourdough starter
75g rye flour
75g filtered water

Instructions: 

In a medium bowl mix together all the ingredients using spatula. It will be a thick paste. Cover the bowl with a cling film and leave to ferment at room temperature for minimum of 8 hours or overnight.

STAGE 2

Ingredients:

all production sourdough (approx 200 g)
350 g filtered water
350 g white strong flour
150 g rye flour
1 tbsp raw honey or sugar (optional)
1 ½ tsp unrefined sea salt

Equipment:

medium bowl for mixing the dough
spatula
stand mixer (optional)
cling film
bread tin

Instructions:

Mix all ingredients together and knead with a spatula or in a stand mixer with a bread hook for 8 minutes, the dough will be quite liquid. Transfer the dough into a medium bowl, cover with cling film and leave to ferment at room temp for a minimum of 8 hours or overnight.

After the initial ferment, transfer the dough into the bread tin (line it with unbleached parchment paper if using nonstick one), the dough should occupy slightly more than a half of the tin, cover with cling film and leave at room temperature to proof for around 5-8 hours. It will rise approx 1.5 times and will be bubbly.


Heat the oven to 220°C Fan/ 240°C and bake the loaf for 30-45 minutes depending on your oven. Bake out of the tin for the last 10 min. Take the loaf out and cool it on the rack covered with the kitchen towel. Make sure it is completely cold before cutting it.


This bread keeps well in a plastic bag for a week which keeps the bread very soft and chewy. I noticed that after a week it starts getting white mould, this is because the water content of this bread is quite high in relation to flour so try consuming it within one week, or you can cut it up and freeze some. You can also keep it in a cloth or paper bag and it will stay without mold longer but will be quite hard.To defrost, simply place in a warm oven for a few minutes if in a hurry or place into a plastic bag in the kitchen counter overnight.

Please enjoy!

PS: This recipe is adapted from Dark Silestian Rye Chleba in the book by Daniel Leader and Lauren Chattman called Local Breads.

8 November 2014

Sourdough Biscotti


Ingredients:

50g white sourdough starter
40g unsalted butter, softened
80-100 g sugar
40g raw honey
2 large eggs
1 tsp vanilla extract
pinch of unrefined sea salt
250g + all purpose flour
80g crispy nuts of your choice roughly chopped (can use crispy seeds too)
50g shaved coconut
100g dried fruit roughly chopped (I use mixture) 

All ingredients are organic except the sea salt.

Instructions: 

Preheat oven to 180°C /160°C Fan together with the baking stone (if using); line baking sheet with parchment paper if not using the baking stone.

In a medium bowl combine starter, eggs, butter, sugar, honey, vanilla extract and mix up with a spatula or if using a stand mixer use the whisk attachment. Then gradually add salt, flour, coconut, nuts and dried fruit and mix using the spatula or bread hook (if using the mixer) and mix till the dough forms, add more flour if needed, the dough should be heavy, greasy and not very sticky. Do not over-knead. Form a ball and place in a small bowl (it is not going to expand) cover with cling film and leave at room temperature overnight or for minimum of 8 hours.

When ready remove the dough from the bowl and form into a long flat log around 5cm thick, divide into 2 logs if desired.
Place on the lined baking sheet or straight into the hot baking stone and bake depending on your oven from 25 minutes for up to an hour, it should be slightly brown.

When ready take it out of the oven and cool it down for around 30 minutes or until cool enough to handle. When cool gently cut the loaves on the angle into 1cm slices (a serrated bread knife works best). 
Return the pieces into the oven and bake the biscotti for another 10-15 minutes on each side, less if you like it softer. Store in an airtight container. 

Enjoy!

14 January 2014

Herby Butter

This butter is very versatile and you can use any combination of herbs you like, or just experiment with different ones every time. You can also use twice as much the amount of herbs and the butter will be much greener and more flavoursome.
This recipe is perfect for taking to a party or other occasion as it is relevantly cheap, easy and quick to make and can be used with many things like bread, potatoes and even as a dip.


Ingredients:

1 block of organic grass-fed preferably raw unsalted butter (usually 250 g)
you can use salted butter too, then you would not need salt
1 handful of fresh organic parsley stalks with leaves
1 handful of fresh organic basil leaves
1 small clove of organic garlic
unrefined sea salt (to taste)
3-4 drops of organic freshly squeezed lemon juice

Equipment:

food processor or hand blender (optional)
wrap paper from the butter or 250 g glass jar with lid or butter dish with lid

Instructions:

I recommend to leave your butter on the kitchen counter overnight or for at least 2-3 hours so it is soft and pliable. However if you forgot to do that or have no time to wait then just cut up the block of butter into smaller cubes and place in the warm oven for a while but be careful not to melt it to the liquid consistency, it needs to be just soft like this.


Alternatively you can use the cold butter, but it will take more effort and a bit longer to fluff.

Put the butter into the medium bowl and using a wooden spoon or spatula fluff the butter.


Now using your favourite knife and preferably wooden chopping board chop up parsley very fine


place it in your food processor or the cup for the hand blender, if using. If you are not using anything to blend your herbs then just try chopping them as fine as you can and place it straight into the fluffed butter.
Chop the garlic and basil, add them to the parsley and squeeze a few drops of lemon juice. Now blend it if using the blending equipment.

Now add the blended herbs into the fluffed butter and mix everything together, season with sea salt according to your taste.


Taste it for salt and adjust if needed.
Now it is up to you what container you want to use for your herby butter, you can wrap it back into its original wrap or place it into the butter dish with lid or just a random jar with a lid, like I did


Enjoy and please remember to share your favourite combinations in the comments below!!!

This post is linked to Kelly the Kitchen Kop’s Real Food Wednesday blog carnival, and to Fight Back Friday blog carnival at Food Renegate.


11 January 2014

Home Made Sausages Without Skin or any Special Equipment. Super Healthy! Super Easy!

My family loves sausages. My son prefers them with fried brussel sprouts or asparagus or with some rice. I am not always able to source the decent ones without wheat and other unnecessary ingredients so I came up with the simple recipe of my own.
This recipe is based on the traditional Russian meat patties (kotleti) and has absolutely no wheat!  I do add some liver into my sausages so it is an excellent way to include liver into your family's diet if some of the members don't favour it in any other form like my son.
As you probably know, organic pastured liver is an excellent source of vitamins A, B and C, folic acid, iron and many more vital nutrients, more information on that is here.
I also add some lard, it makes the sausages fluffier, and is also an excellent source of vitamin D, more information on that here.
I eventually stopped buying sausages and started making my own. I prepare a batch and freeze it. When I need to use sausages I just thaw some on the kitchen counter or covered in the fridge overnight or if I am in a hurry in the oven-proof shallow dish in the oven.
I also use this same recipe for making meatballs and burger meat, I just freeze the meat in around 100 g balls on the plastic lid covered with cling film and then transfer to a zippy bag and keep in the freezer.
This recipe is calling for experimenting, so if you and your family have some favourite spices that you think will go well, then please do add them and share the results in the comments.

Ingredients:

250 g organic grass-fed beef/wild venison mince
250 g organic pastured pork mince
1-2 organic pastured chicken liver/s
(I use the ones that come inside the chicken carcasses I buy for the bone broth, the liver inside usually comes with a chicken heart, so I throw that in too)
1-2 tbsp organic pastured lard
2 stalks of organic parsley with leaves (and/or any other spices you like) - optional
1 small organic onion
2 cloves of garlic
1 small organic potato (optional)
unrefined sea salt
freshly ground organic black pepper

Equipment:

food processor (optional)
cling film

Instructions:

If you are using the food processor, pulse together onion, garlic, peeled potato, parsley and liver almost to the liquid consistency. If  you are not using the food processor cut each ingredient mentioned in the above sentence very fine, as fine as you can.
Combine all the ingredients in a fairly large bowl, season with salt and pepper and add any other seasoning you like. Now you need to 'beat' the meat 'dough': pick it up with one hand and drop it back into the bowl and so on for 3-5 minutes. This will bind the meat quite well, this is what my mum always used to do.

Cover the bowl with cling film and leave to season for 2 - 6 hours. I leave mine overnight in a cool place. If you are seasoning your meat for 2 hours only then you can do that at room temperature, if longer first 2 hours at room temperature and the rest of the time at cooler temperature (like pantry) or in the fridge.

When ready to make the sausages take a spare cutting board or rectangular plastic lead from one of the food containers or something similar and cover it with cling film leaving as much extra cling film on the sides as necessary to cover the sausages later. Scoop half of the meat and place it on top of the cling film. Using wet spatula or bench scraper shape the meat into about 2 cm thick rectangle, helping yourself with the cling film edges as well as the fork, see what works best for you.


 Using wet spatula or bench scraper again divide the meat rectangle into separate sausages, leaving space between them, like this


try to do it more evenly than I did it :)

Cover the sausages with the cling film, folding the sides and covering it completely. Place the tray with sausages into the freezer. Repeat the process till all the meat is made into sausages. I usually leave mine in the freezer overnight or for 24 hours. The sausages need to harden so you can uncover them and transfer them into a plastic zip bag and store them in the freezer until you need them.

When I am ready to cook the sausages I thaw them on the counter at room temperature or if I am short for time in an oven proof dish in the oven. I then fry them and serve.

Hope you like the recipe and will share your experience in the comments below!

This post is linked to Gluten Free Wednesdays, Kelly The Kitchen Kop's Real Food Wednesdays and Food Renegad's Fight Back Friday blogs' carnivals.


25 October 2013

Pumpkin cream-soup

This is an easy to cook and very seasonal dish that is amazingly rich and nourishing. All the ingredients I use here are organic.

Ingredients:

1 medium pumpkin
2 large carrots
2 medium onions
2-3 garlic cloves
100 g butter (I use 1/2 a block or sometimes more)
small bunch of green onions (optional)
small bunch of parsley (optional)
50 - 100 g double cream
1 1/2 - 2 litres chicken stock (warm or hot)
sea salt and ground black pepper (to taste)

Equipment:

Hand blender

Instructions:

Clean the pumpkin using the potato peeler, or any other way you prefer. Cut it in small cubes and set it aside. Finely chop onions and garlic and sauté them slightly in a heavy-bottomed cast iron skillet with a generous blob of butter. Peel and grate the carrots and place them together with the onions and garlic, add roughly chopped green onion if using and pumpkin cubes, cover with a lid and cook until the pumpkin is very soft. At the end add some salt and pepper and the last chuck in some chopped parsley, if using. Leave it with the closed lid for a minute or 2 and turn off the gas.

Place all the ingredients from the skillet into approximately 3 litre pan, add half of the chicken stock, the rest of the butter, 50 g of the double cream and using hand blender blend the mixture till it reach the consistency that you like. Try it and see if you need to adjust salt and pepper; see if it is liquid enough for your taste, if not add some more stock and/or cream and blend a bit more or just mix everything with a big spoon. Taste again to see that you are happy with the result.

It is very good on a cold autumn day with a spoon of sour-cream and some croutons or just on its own.
Please enjoy!


17 September 2013

Sourdough Flatbreads

This recipe is very tasty to have for breakfast with your favourite dip, salsa or chutney; it is good with meats or sausages, salad or sautéed vegetables or just with some butter and cheese. These flatbreads are absolutely fantastic to cook on the barbecue grill along with the meats and vegetables. They are best to eat while warm.


Ingredients:

200 g (under 1 US cup) plain organic yoghurt (I used here raw unpasteurised)
100 g (under 1/2 US cup) active white sourdough starter (here is the recipe)
300 g (1 1/4 US cup) organic white all purpose unbleached flour
1 tsp unrefined sea salt
1 tbsp raw organic honey (optional)
Organic rice flour for dusting

Equipment:

Mixing bowl
Cling film
Rolling pin
Cast iron grill pan (or regular cast iron pan, or barbecue frill)

Instructions:

Mix together yoghurt, starter, flour and salt, knead for a few minutes. If you or your child do not enjoy the sourness too much just add honey to cover that up, you might want to add a bit more flour. The dough should be soft and just slightly sticky. Transfer the dough into lightly floured bowl, cover with cling film and leave to ferment for 8 hours or overnight. I usually mix the dough in the evening and ferment it overnight so we can have the breads for breakfast. I left it out longer and used one half for breakfast the next morning and the rest (resting covered at room temperature) for breakfast the day after and it was still very yummy.

When ready heat the cast iron grill pan and divide the fermented dough into 8 balls. Dust the counter with some rice flour and roll out one of the balls into a flat circle around 2 mm (1/8") thick, make sure it is smaller in diameter then your grill pan if you have a small one like I do. Transfer the dough circle straight into the hot grill pan. Grill each side for around 1 minute or until ready.


Your grill pan should be really hot and not oiled. Transfer the flatbread straight into a plate to eat right away or a kitchen towel lined bread basket or shallow bowl and cover it with another kitchen towel to keep it soft. Repeat with the rest of the flatbreads and keep them covered with tea towel.

The flatbreads keep well covered with a kitchen towel for about an hour, for longer storage transfer them into the plastic bag, reheat on the grill.

This recipe is my new e-book Sourdough Goodness. If you want to get the book please email me at annadroz@gmail.com


Traditional Recipes Collection is HERE!!!

This post contains affiliate links and if you purchase something I get a commission. Thank you for your support of this site!

I really enjoy cooking and baking and I am always looking for new ideas for healthy recipes so when I saw this collection of books I got really excited, it had everything I needed. This e-book collection is smaller and cheaper than a lot of the ones that I have seen coming through recently.  It’s very niche-specific, only traditional food recipes and mostly books that have not been in any of the recent bundles.

It contains over 800 healthy real food recipes, including snacks for the whole family, yummy deserts, main dishes and sides, condiments, smoothies, as well as meal plans, formulas on designing your own healthy dishes with the available ingredients, information on kitchen tools, techniques, pantry staples, meal planning, and so much more. This is really something not to be missed!


Traditional-Recipes-Bundle-400x600

Are you new to real food and wish you had more healthy recipes…including snacks and money-saving ideas? When someone asks, “What’s for dinner?” do you have an answer? Is it “the same old?” The Traditional Recipes Collection is here to help. With 17 books, over 800 recipes and ideas, worth over $150 for just $14.97, this collection is an amazing deal. It’s available for 5 days only, from Tuesday, Sept. 17 through 11:59 PM (EST) on Saturday, Sept. 21. There will be no late sales. Please see the fine print at the bottom for all sale details. With one simple purchase, you can get access to 17 different books from prominent and up-and-coming real food bloggers. There are books to teach you how to include more healthy ingredients, how to save time, how to save money, how to create food that goes with you, how to make desserts and holiday dishes, and so much more. View the FAQ.

  buy-now-button

Books

Kitchen Help


Main Dishes


Snacks and Sides


Desserts, Baking and Special Occasions

 
  buy-now-button

Bonus Offers

IsYourSaltRealBooklet-100x100 15% off Real Salt orders. Get healthy, unrefined sea salt delivered to your kitchen.
Wise choice logo 5% off Wise Choice Market orders over $50. Pick up mineral-rich stock, soaked nut butters and cereals, or even potato chips made with coconut oil.
Simple natural health Simple Natural Health by Nina Nelson of Shalom Mama. Keep your family healthy this winter not only with food, but with homemade remedies.
tradishen-on-green One month FREE premium membership to Tradishen. Your premier 100% real food recipe and meal planning site.
dietician cassie $25 off Dietician Cassie one year package -- Get some help with personal nutrition and health coaching!
  buy-now-button

Giveaways

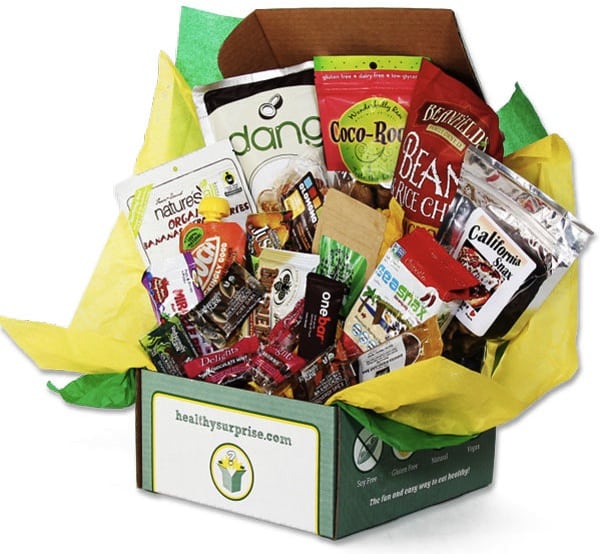
In addition to the already awesome package we have here, one lucky reader is going to get the chance to win a Healthy Surprise box! If your family struggles with snacks, this company offers packages of healthy snacks that are delivered to your door once a month. There are three box sizes with different amounts of snacks in them. These snacks are all allergy-free (top 8), grain-free, vegan, and mostly organic. They're appropriate for almost any family! No purchase necessary to enter.
box-healthy-600x554 $75 value “Healthy” Healthy Surprise snack box
Enter here: a Rafflecopter giveaway buy-now-button View the FAQ.

Offer Details

  • Sale runs 9 AM EST Sept. 17 through 11:59 PM EST Sept. 21
  • No late sales
  • ALL SALES FINAL
  • Buyers may be from anywhere in the world; but books are only in English
  • There are no physical/shipped products; the bundle offer is digital only.
  • Download links are good for 5 attempts or through 10/31/13, whichever comes first.
  • Bundle may not be downloaded and links cannot be re-activated after 10/31/13
  • Bundle files may not be shared. Each book may be on only one computer/one residence at once
  • Buyers are permitted to share books if they send files they do not want to one other person and delete the files themselves, so only copy of each is in use
  • If buyers split the bundle, they only get one set of bonus offers and must share
  • Bonus offers must be claimed by 9/30/13
  • Bonus offers may not be available in non-U.S. areas
  • Bonus offers are made through a third party and we do not have any control over them. Items may be unavailable or sales may end without warning
  • By purchasing, you are certifying that you have read and agree to these terms and conditions
buy-now-button

12 September 2013

Traditional Recipes Bundle!!!

Traditional-Recipes-Bundle-400x600

I've spent far too many nights sitting on my couch, when I've either forgotten to make a meal plan or forgotten to print it out (such a tiny thing that is a huge mistake for me!) wondering...what's for dinner? I start to scour the internet for ideas. I ask you, my lovely readers, what you're having. I check out mainstream recipe sites for new dishes that might contain the ingredients I have. I might even pore over my old cookbooks in the kitchen. Just to find some inspiration. But what if you had hundreds of 100% real food recipes at your finger tips? Recipes that could inspire you for a quick meal...teach you to cook with whatever's on hand...help you make real food frugal...or offer gourmet ideas to plug into your meal plans or special nights? A lot of my readers have said they wished that they had something like this. Next Tuesday, I will have the perfect collection for you: the Traditional Recipes Bundle.

Hundreds of Recipes, At Your Finger Tips


The Traditional Recipes Bundle is a collection of 17 different cookbooks from popular and up-and-coming bloggers. In total, there are over 800 different recipes, spanning all meals and snacks!

In this collection, you'll find:

  • *Lots of allergy-friendly books (half or more are GF/CF)
  • *Books to teach you to cook with what you have on hand
  • *Meal planning
  • *Snacks on the go
  • *Freezer cooking
  • *Printable recipe cards
  • *Health benefits of various foods
  • *Healthy desserts
  • *Gourmet meals
  • *Simple, everyday meals
  • *Make-your-own sauces and condiments
  • *...and so much more!

There is truly something for everyone. It is a really amazing and well-rounded collection, too. There are books for dinner, books for snacks, books for breakfast, books for gourmet cooks (not too many), books for brand-new cooks, books to teach you to make your own condiments, books for smoothies.... You name it! If you're a beginning cook, new to real food, or just tired of the "same old" for dinner, this is an entire library of how-to-cook just about anything (including plenty of bonus information on kitchen tools, techniques, pantry staples, meal planning, and more).

What's the Deal?


A collection like this might run you over $100. In fact, the actual value of this collection is around $150. But next week, for five days only, it will be only $14.97. The sale dates are Sept. 17 (Tuesday) through Sept. 21 (Saturday). The sale begins at 9 AM EST on Tuesday, and ends at 11:59 PM on Saturday night. There will be no late sales. Many of these books are brand-new, and have never been included in a bundle before. Out of the 17 books, 10 have never been in other collections. This means that if you choose to purchase, you won't be getting "the same old" stuff. It was important to me to put together a unique bundle. I trust the authors that I chose to include, and I spent months looking and selected very carefully. There are bloggers out there whom I respect and enjoy, but whose books I chose not to include. These are new, unique, and totally real food. Some of the bloggers may be unfamiliar to you but I have worked with all of them in some capacity and I am eager to share their books and their recipes with you. I've even tested some of their recipes! This is also a smaller collection and at a lower price point. There have been other bundles before...plenty of them. I listened to the feedback my readers gave me when I promoted them. They asked for: smaller/less overwhelming collection, lower price, and more focused. That's exactly what this bundle is.

What's In the Bundle?


You might be wondering, what exactly is in the bundle, anyway? Let me tell you all about it.

Kitchen Help


  • Cooking With Coconut Oil by Jennifer Saleem of Hybrid Rasta Mama (68 delicious recipes featuring coconut oil)
  • Design a Dish by Millie Copper of Real Food for Less Money (6 basic formulas for creating recipes with what you have)
  • Restocking the Pantry by Kresha Faber of Nourishing Joy (57 sauces, condiments, and more)
  • Real Food, Real Easy by Angela Montgomery of Real Whole Health (13 frugal, easy recipes)
  • Real Food for Real Homemakers by Jami Balmet of Young Wife’s Guide, Jaimie Ramsey of Living In the Light and Elsie Callender of Richly Rooted (78 basic recipes + printables + how-to-anything in the kitchen -- NEW!)
 

Main Dishes


Snacks and Sides


Desserts, Baking and Special Occasions


As you can see, there are many amazing selections in here, possibly some you've had your eye on. In this collection, you can get them all for 90% off.

Is There More?


Actually, there is more. :) We'll be offering a few bonus items that anybody who purchases the bundle will get.
  • A coupon code for Real Salt
  • A coupon code for Wise Choice Market
  • A free premium trial membership to Tradishen
  • Simple Natural Health, by Nina of Shalom Mama
  • ...and more (we're still talking to a few excellent companies!)
We'll also be offering a giveaway (and no purchase is required to enter) of a $75 "Healthy" size Healthy Surprise box. By the way, if you are in the real food business and would like to sponsor a giveaway or a bonus offer for this sale, send me an email! We can take companies through Saturday. It's a great way to expose new, motivated readers to your business! kate@modernalternativemama.com. Whew. So, that's the deal. 17 great books, over 800 recipes, for just $14.97 -- plus four or more great bonus offers and a chance to win a Healthy Surprise box. The only catch is that the sale only lasts for five days, Sept. 17 - 21. I really tried hard to put together a collection that would be valuable to as many readers as possible. I hope that you're looking forward to this as much as I am. Don't forget to join us Tuesday at 9 AM to get your copy!

Which book(s) intrigue you the most?


My first e-book!!!

I am so excited!!! I have written my very first e-book! 


You know how I am converting all these recipes into sourdough ones, well I had an idea of writing a book about it. My book is all about baking with sourdough starter. 


It all started when I learned about the health benefits of the sourdough or wild yeast and at about the same time I discovered how wheat and other grains, if not prepared properly, can cause serious health problems. The problem was that me and my family really love bread and other baked goods and I did not want to exclude them completely from our diet. So I found a way to have my cake and eat it too, literally. Making all those recipes using sourdough starter allowed my family to keep enjoying our favourite foods and at the same time we could maintain our health. This was so exciting! 

I started converting the recipes that used wheat flour into sourdough versions, which came quite naturally and turned out to be easy for me to do. So now whenever I see a new recipe that requires baking with flour I say to myself: 'I bet I can convert this recipe to use the sourdough starter and make it healthier and try to keep it tasty at the same time'. 

At some point I collected so many of those recipes that I decided to put them together in a book and I called the book Sourdough Goodness. But then I realised that I had enough recipes for 2 books and so I decided to divide Sourdough Goodness into 2 volumes. I am happy to announce the release of the Volume 1, the second volume is still in the making and unlike the first volume that has only savoury recipes the second volume will have some sweet recipes as well. 

The book is quite versatile, it contains recipes from different cuisines: Russian, Jewish, English, Italian, French, Mexican, Middle Eastern, Indian, Jamaican.

If you are interested in my book you can get it through Amazon, Kobobooks or directly here.

I hope you enjoy it and happy reading!!!!!


10 August 2013

Coconut Flour Brownies

This is a very quick and easy recipe. You just mix it up, bake and within an hour you have a healthy and very tasty treat for the whole family. This is amazing how easy this is!


Ingredients:

100g organic preferably raw butter plus some extra for buttering the baking tin
100g organic dark good quality chocolate
4 organic free range medium eggs
170g raw organic honey (or organic rapadura, or organic coconut sugar)
1 tsp organic vanilla extract
1/3 tsp sea salt
50-60g organic coconut flour

Equipment:

mixing bowl
17×26 baking or roasting dish/tin (I use glass)

Directions:

Heat the oven to 180C.

Gently melt chocolate and butter. Beat the eggs in a mixing bowl, add the butter and chocolate mixture (make sure it is cool), vanilla, honey, salt. Mix everything very well. Now mix in the coconut flour, I would advise to put the first 50g and mix very thoroughly, then set the mixture aside for one minute. The coconut flour has loads of fiber and absorbs a lot of moisture, so wait and see your mixture thicken quite a lot. After a minute check the batter and decide if you want to thicken it further.

Pour the brownies batter into the buttered baking dish, brownies will not rise so you can use the smaller dish or make the double batch. Bake for 20-25 minutes. Make sure to cook down before eating it.

And now enjoy!

8 August 2013

Sourdough Pelmeni (Russian Meat Dumplings)

This is a very traditional Russian recipe and does require time to prepare, but once ready it is a very nutritional, healthy, fast and easy to prepare meal. Please read through to make sure you set aside enough time to prepare this recipe.


Ingredients:

For the dough

100 g white active sourdough starter
100 g filtered water
3 organic free range eggs
1 tsp sea salt
500 g organic white all purpose flour

For the meat filling

350 g organic pastured pork mince
350 g organic pastured beef mince (or wild venison mince if available)
50 g organic pastured chicken liver
50 g organic pastured lard or beef tallow or butter
1 small organic onion
2 medium cloves of organic garlic
salt and pepper to taste

Equipment:

mixing bowl
cling film
rolling pin
Russian pelmeni maker (they sell it on ebay)

Instructions:

Mix all the ingredients for the dough and knead it very well for around 10 minutes. The dough should be quite stiff. Place the dough in a slightly floured bowl and cover with cling film. Leave the dough at room temperature for at least 8 hours or overnight.

After 8 hours or in the morning prepare the meat filling by blending together all the liver, fat, onion, garlic and spices. Add this mixture into the pork and beef (venison) mince and mix it thoroughly with your hands if possible, beat it by lifting the meat mixture and slamming it back in the mixing bowl, do that for at least 5 minutes. The fat and liver in the mixture makes the filling soft and fluffy, and the beating makes it bind together better. After you done, cover the bowl with the meat with cling film and let it 'rest' for 10 minutes.

In the meantime take the dough, nip off a small fist-size ball and roll it out very thinly on a lightly floured surface, leave the rest of the dough covered with cling film. Take the pelmeni maker and sprinkle it with some flour so the dough doesn't stick to it,


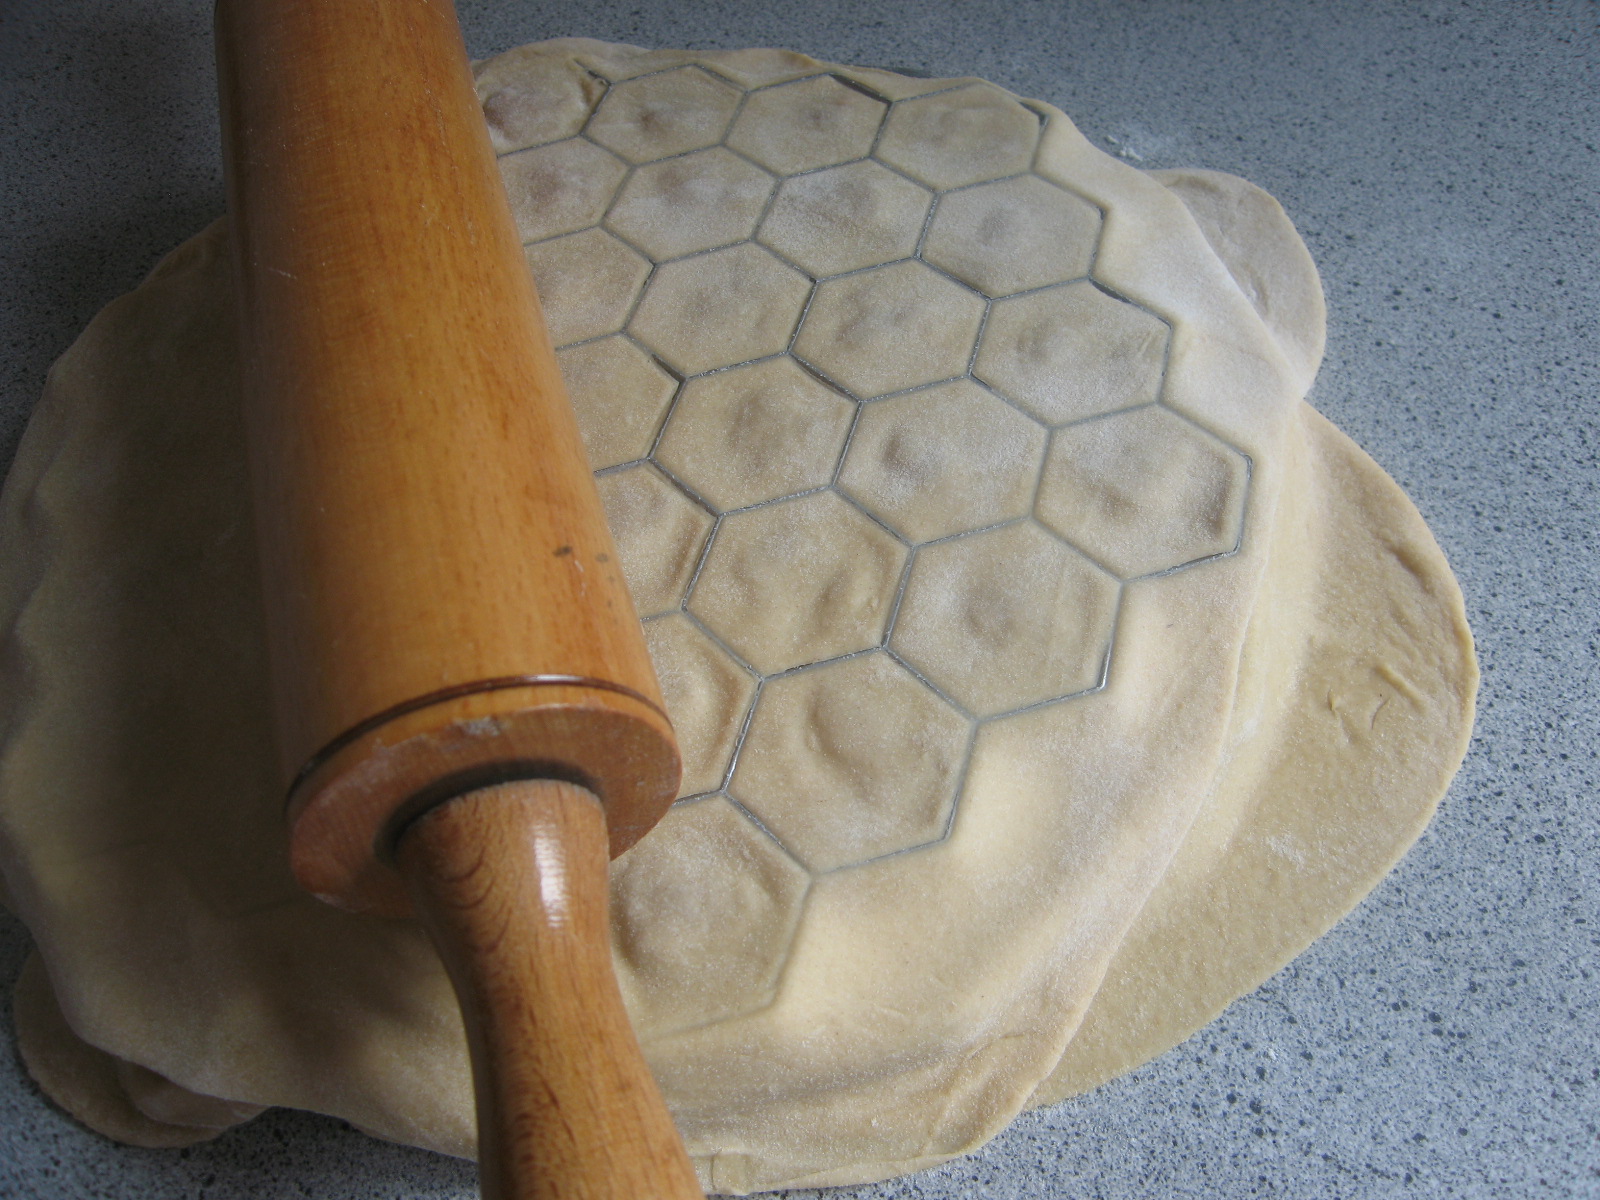
place the rolled out dough on top of the pelmeni maker.


Now you need to fill every opening with the meat mixture that you prepared earlier. Take two tea spoons and scoop the meat with one, there should be about 1/2 of the tsp of meat or slightly more, do not be tempted to take more meat as the finished product might burst, manipulating the piece of meat with two tea spoons scoop it out into first opening. Proceed filling in every opening of the pelmeni maker.


Do it as evenly as you can, some balls of meat will be bigger some smaller, that is ok.
Next cut another fist-size ball from the dough, roll it out thinly and place it over the meat.


Take the rolling pin and very gently bash on the top layer of dough so that the meat balls sink inside and then roll it on top to separate the pelmeni.


Remove the extra dough from around,


 pick up the pelmeni maker by the edge, turn it upside down and bash its side on the table so that the pelmeni fall out


be careful not to squash already fallen out pelmeni. Now for easier storage you need to freeze them. The best way to do it is by placing ready pelmeni on the slightly floured flat surface, I use plastic leads,


cover them with some cling film and transfer to the fridge for a few hours or until the pelmeni are frozen hard, then you can transfer them all into a large plastic zip bag and place into the freezer for the storage.

Keep doing the same using all the dough and all the meat.

At the very end when you have a small mount of both meat and dough I would advise you to finish off without the pelmeni maker. Here is how. Roll out the remaining dough thinly, take a narrow glass about 6-7cm in diameter and use it to cut the circle of dough,


then place the same ball of meat as above in the middle of the circle, take the circle in your hand bring the edges of the dough together to form a semi-circle and pinch the edges with your fingers, then bring the opposite ends together and form a round pelmen by pinching the ends together firmly.


You can actually make the whole batch like that manually if you decide to be really traditional about it.

In case you have some leftovers of meat and no more dough you can form meat balls and freeze them. If you have leftovers of dough you can roll it out very thinly, cut out long strips with a pizza cutter and you have tagliatelle pasta.

As soon as you make the pelmeni you can cook them straight away. You need to boil some water in a pot, adding 2-3 peppercorns, 1 bay leaf and some sea salt.


When the water is boiling throw in the amount of pelmeni you intend to eat, do not cover with the lid. Fresh pelmeni need 1-2 minutes to cook in the boiling water, they will be floating on the surface. When ready fish the pelmeni out with a skimmer, place them in a bowl and eat straight away. But if you really want to be Russian about it, add some sour cream (you can make your own, here is the recipe), a tea spoon of horseradish sauce and some of the liquid, mix everything together and eat as a soup.

The frozen pelmeni can be eated the same way, you do not need to thaw them, just boil the water and put the frozen pelmeni straight in, they will take 2-3 minutes in the boiling water to be cooked.

Pelmeni keep in the freezer for a few months and are really tasty and nourishing alternative to fast food or whenever you have no time for cooking.